When I hung up the letter hooks in Nora’s bedroom, it started an addiction that could only be fed by adding more hooks. Blake hung some little brass hooks in my craft closet for me that are now holding gift bags, and I ordered three more hooks from Restorers (through Amazon) for Nora’s room.
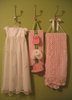
I knew I wanted to hang her blessing dress and the gorgeous handmade blanket she got from her anonymous “secret grandma,” but that left one empty hook and a long narrow space in the middle. With Sarah’s help, I brainstormed an accessory holder.
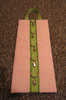
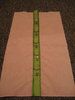
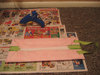
Here’s the result:
![]()
I’m really happy with how it turned out, and the whole thing took less than two hours to make. Endless variations are possible to suit your needs and tastes. Instructions and the materials I used are after the jump, if you’re interested.
Materials:
Steps:
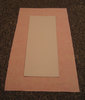
1. I cut the cardboard to the width I wanted, getting rid of the bent-up corners in the process. Then I set the cardboard on my fabric and cut around it, leaving plenty of extra fabric to wrap around the back.
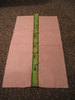
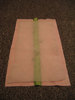
2. I pinned the dark green ribbon down the center of the right side of the fabric, and just stitched right down the center with the sewing machine. Easy peasy.

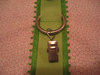
3. The next step was a little bit tricky for me, since I’m not really a good spatial thinker. I centered the cardboard on top of the fabric and ribbon, and marked the top center and bottom center of the cardboard with a pin. Then I messed around with the clips, the light green ribbon, and some pins for a while, until they looked right. The idea is that the light ribbon threads through the clip rings, which are held in place by one pin through all three layers in the center of the loop. These pins will be replaced with stitching in the next step.
4. Next I replaced the pins with stitching. I slid the rings on each side away from the pin, carefully removed the pin without letting the ribbon slip, and backtacked over the light green ribbon a bunch of times.
5. I cut a piece of batting a bit smaller than my fabric.
6. Then I plugged in my trusty hot glue gun, and while I was waiting for it to heat up I ironed my fabric so the final product would be nice and smooth. Placing the fabric right-side down, and the batting centered on top of it, and the cardboard centered on top of that, I folded the two ends over the cardboard and glued them down. I took special care to make sure the ribbon stayed centered on the cardboard, and pulled each end of the ribbon tight while pressing it into the glue. Don’t burn yourself–hot glue hurts like a mother.
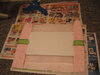
7. Folding the corners like wrapping a present, I pulled the sides in tight and glued them down, too. While the glue was still warm and slidy, I turned the project over to the right side and made sure things looked smooth and not puckery from the front. Then I took the leftover light green ribbon and glued it in a loop to the back side of the top edge. If I’d wanted to get fancy, I could have cut a panel from the leftover fabric, ironed the edges under, and glued it to the back of the project to cover the empty cardboard and rough edges. Nora was getting hungry, so I bagged that idea, but I might still do that sometime if it starts bugging me. It would definitely look more professional and finished that way.
8. Ta-DA! I used five of the curtain clips for optimum future flexibility. I’m only using three of the clips now (see the top picture above), but in the future I might want to display different items, and I wanted to be able to accommodate various sizes.